:max_bytes(150000):strip_icc():format(webp)/wash-up-87891291-5c452994c9e77c0001184241.jpg)

What You’ll Need
Equipment / Tools
- Channel-lock pliers
- Bucket
- Tape measure
- PVC pipe cutter or hacksaw
Materials
- Air admittance valve
- Sanitary tee fitting
- PVC pipe
- PVC primer
- PVC solvent glue
- Pipe-seal tape
- Additional PVC fittings (if needed)
- New drain trap (if needed)
Instructions
Remove the Drain Trap
Using channel-lock pliers, loosen the slip nuts holding the drain trap, then disconnect and remove the trap bend and trap arm from the sink tailpiece and branch drain. This will give you plenty of room to work comfortably. A bucket is useful to catch water in the drain trap as you remove it.
Plan the Layout
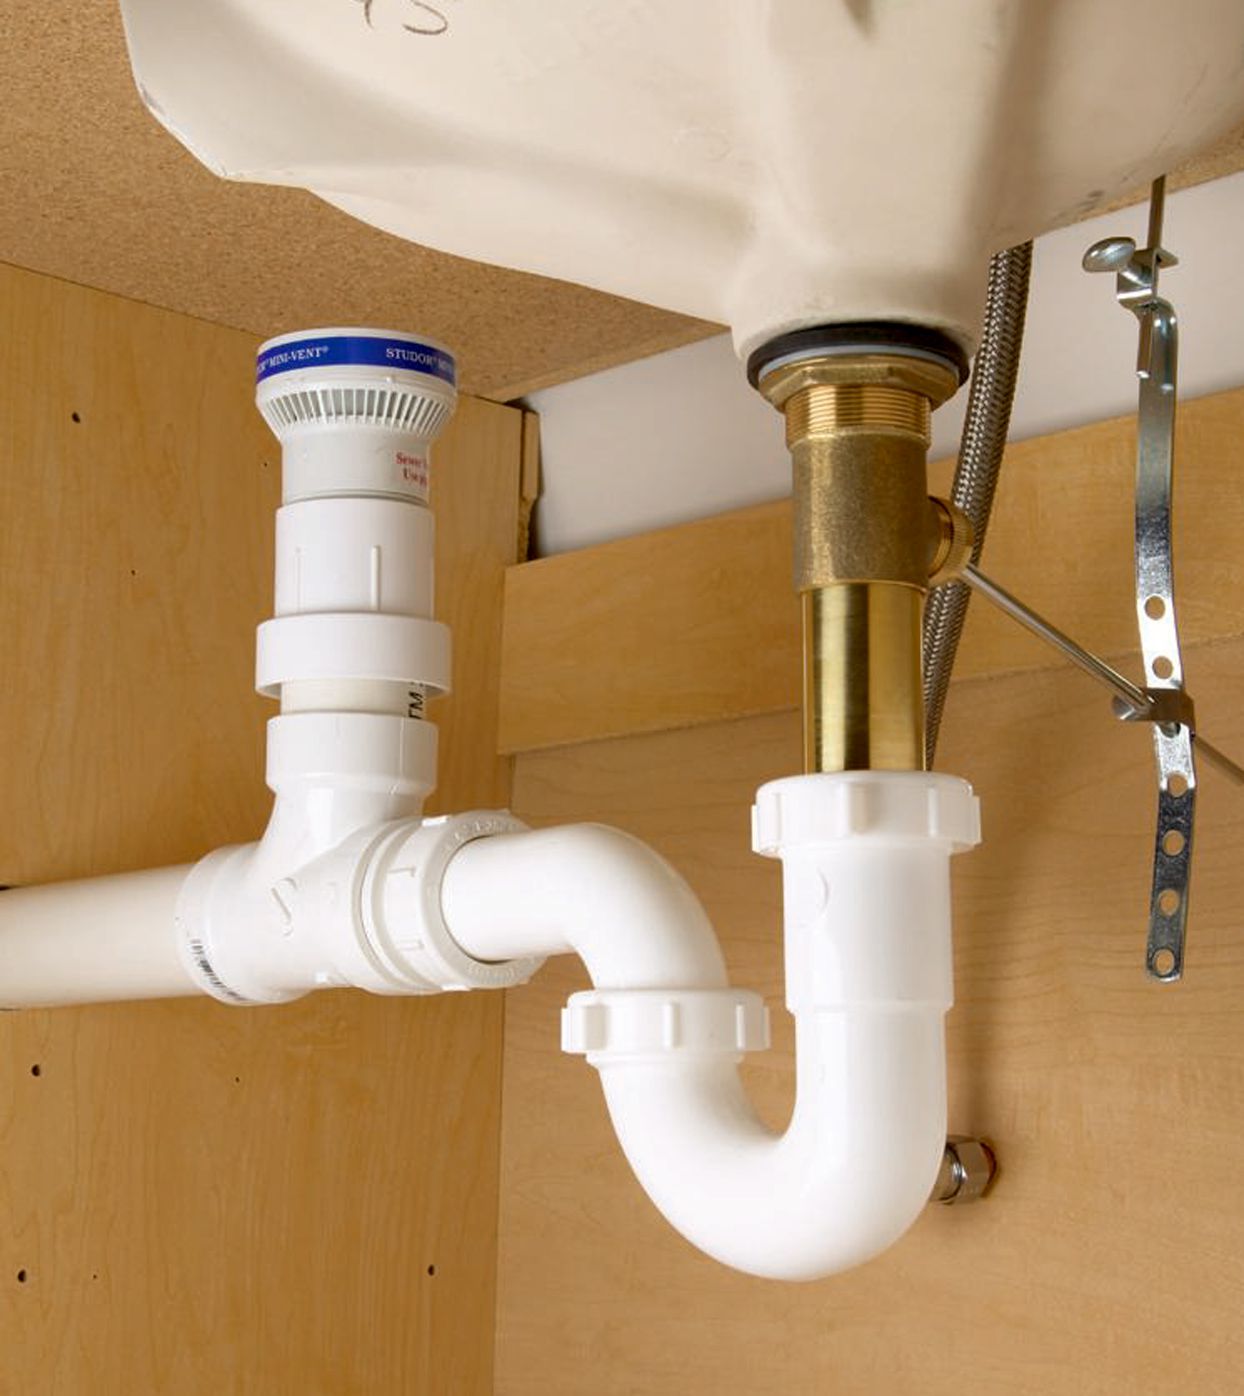
Plan an arrangement of drain trap components, a new sanitary tee, a pipe extension, and air admittance valve in a way that will allow the assembly to fit under the sink. This will involve cutting sections of PVC pipe, and may also involve shortening the trap arm. The goal is to add a sanitary tee into the existing configuration so that a vertical pipe extension can be inserted to attach the AAV. Careful measurements are required. To work properly, the bottom edge of the AAV needs to be at least 4 inches above the top of the drain trap.
It’s a good idea to leave as much room under the sink as possible by keeping the AAV and extension pipe toward the back while making sure they are still accessible if you remove the trap. Plan to position the AAV as high up under the sink as possible while keeping it accessible for service in the future.
Test-Fit the Parts
Cut whatever pipe extensions are necessary, then dry-fit all components together (without glue) including the drain trap and trap arm. Position the entire assembly under the sink, with the drain trap bend placed on the sink tailpiece and the trap arm inserted into the new sanitary tee. Once you are confident that the assembly will fit correctly, you can use a marker to make alignment marks on the pipes and fittings. This will help you quickly align the parts correctly as you solvent glue them together.
Install the AAV Assembly
Take the assembly apart, then begin connecting any joints that are glued together. This usually includes the sanitary tee, the vertical extension pipe, and whatever pipe extension or connectors used to join into the branch drain. Prime the ends of the pipe extensions and the inside surfaces of fitting hubs, then apply solvent glue and joint the pipe pieces to the fittings.
Attach the air admittance valve to the top of the vertical extension pipe extending from the sanitary tee. The style of attachment varies depending on the AAV; most come with a threaded adapter that is first solvent-glued onto the vertical extension pipe, with the AAV then threaded into this adapter. Wrap pipe-seal tape around the male threads of the AAV before screwing into the socket on the pipe adapter.
Attach the Drain Trap
The drain trap now goes into place in typical fashion, but rather than the trap arm fitting directly into the opening for the branch drain, it will now fit into the sanitary tee where the AAV is installed. Some form of transition fitting may be required to allow the trap arm to fit the sanitary tee.
Join the trap arm to the trap bend, but leave the slip nut loose at this point. Slide the trap bend onto the sink drain tailpiece, and slide the trap arm into the sanitary tee fitting. When the pieces are properly aligned, tighten down all slip nuts, using channel-lock pliers.
Fill up the sink, then drain it quickly as you watch the fittings from beneath the sink and look for leaks. If necessary, tighten any leaking slip joints with channel-lock pliers.